In the previous lesson, we have learned how to write code for the TextBox and the Label. In this lesson, we shall learn how to code for two more controls, the ListBox, and the ComBox. Both controls are used to display a list of items. However, they differ slightly in the way they display the items. The ListBox displays the items all at once in a text area whilst the ComboBox displays only one item initially and the user needs to click on the handle of the ComboBox to view the items in a drop-down list.
ListBox is a control that displays a list of items. It allows the user to click and select the items from the list. Items can be added by the programmer at design time or at runtime using a code. We can also write code to allow the user to add items to the ListBox or remove the items from it.
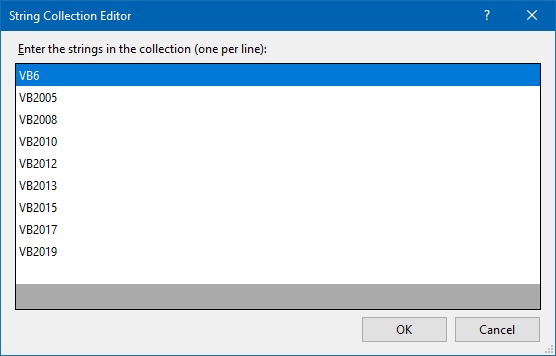
To demonstrate how to add items at design time, start a new project and insert a ListBox on the form. Right-click on the ListBox to access the properties window. Next, click on collection of the Item property, you will be presented with String Collection Editor whereby you can enter the items one by one by typing the text and press the Enter key, as shown in Figure 6.1
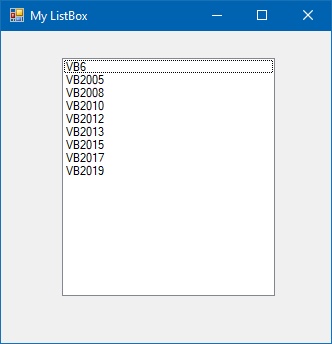
After clicking on the OK button, the items will be displayed in the ListBox, as shown in Figure 6.2
Items can also be added at runtime using the Add( ) method. Visual Basic 2019 is an object-oriented programming language, therefore, it comprises objects. All objects have methods and properties, and they can are differentiated and connected by the hierarchy. For the ListBox, Item is an object subordinated to the object ListBox. Item comprises a method called Add() that is used to add items to the ListBox. To add an item to a ListBox, you can use the following syntax:
ListBox.Item.Add("Text")
You can enable the user to add their own items via an InputBox function. To add this capability, insert a Button at design time and change its text to Add Item. Click on the Button and enter the following statements in the code window:
Private Sub BtnAdd_Click(sender As Object, e As EventArgs) Handles Button1.Click
Dim myitem
  myitem = InputBox("Enter your Item")
  ListBox1.Items.Add(myitem)
End Sub
* The keyword Dim is to declare the variable myitem. You will learn more about Dim and variables in coming lessons
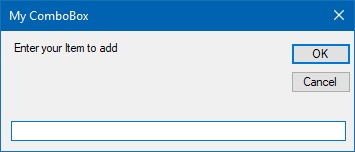
Running the program and clicking on the Add item button will bring up an InputBox where the user can key in the item he or she wants to add to the list, as shown in Figure 6.3
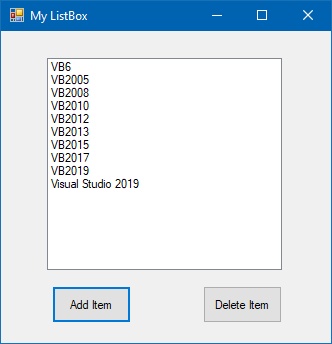
Entering the item "Visual Studio 2019" and clicking the OK button will show that the item has been added to the list, as shown in Figure 6.4
To delete items at design time, simply open the String Collection Editor and delete the items one line at a time or all at once using the Delete key.
To delete an item at runtime, you can use the Remove method in the following syntax:
ListBox1.Items.Remove(“text”)
You can allow the user to delete their own items using an InputBox. To add this capability, insert an additional button at design time and change its text to Delete Item. Click on the button and enter the following statements in the code window:
Private Sub BtnDelete_Click(sender As Object, e As EventArgs) Handles Button1.Click
 Dim myitem
 myitem = InputBox("Enter your Item for Deletion")
 ListBox1.Items.Remove(myitem)
End Sub
Running the program and clicking on the Delete item button will bring up an input box where the user can key in the item he or she wants to delete from the list, as shown in Figure 6.5
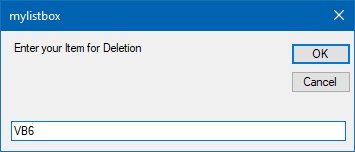
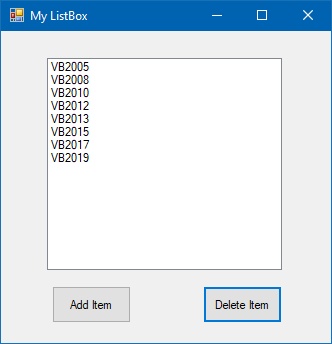
Entering the item "VB6" and clicking the OK button will show that the item has been deleted from the list, as shown in Figure 6.6
To clear all the items at once, use the clear method, as illustrated in the following example. In this example, add a button and label it "Clear Items"
Private Sub Button3_Click(sender As Object, e As EventArgs) Handles Button2.Click
  ListBox1.Items.Clear()
End Sub
In Visual Basic 2019, the function of the ComboBox is also to present a list of items where the user can click and select the items from the list. However, the user needs to click on the handle(small arrowhead) on the right of the ComboBox to see the items which are presented in a drop-down list.
In order to add items to the list at design time, you can also use the String Collection Editor. You will have to type an item under the text property in order to display the default item at runtime. The runtime interface is as shown in Figure 6.7

After clicking the handle of the right side of the ComBox, the user will be able to view all the items, as shown in Figure 6.8
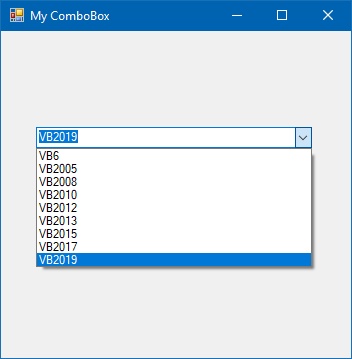
Besides, you may add items using the Add() method. The statement to add an item to the ComBox is as follows:
ComboBox1.Items.Add
In this program, we add a Button and name it as BtnAdd and change its text to Add Item.Besides that, rename ComboBox1 as MyCombo. Enter the following code that also include the InputBox function:
Private Sub Button1_Click(sender As Object, e As EventArgs) Handles Button1.Click
 Dim myitem
 myitem = InputBox(“Enter your Item”)
 myCombo.Items.Add(myitem)
End Sub
Running the program and clicking on the Add Item Button will bring up an input box where the user can key in the item he or she wants to add to the ComboBox, as shown in Figure 6.9
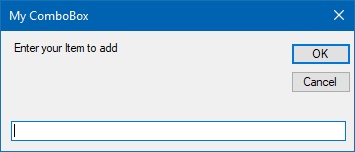
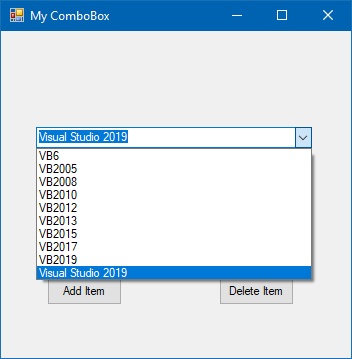
Entering the item "Visual Studio 2019" and clicking the OK button will show that the item has been added to the list, as shown in Figure 6.10
To delete items at design time, simply open the String Collection Editor and delete the items one line at a time or all at once using the Delete key.
To delete the items at runtime, you can use the Remove method, as illustrated in the following example. In this example, add a second button and label it "Delete Item". Click on this button and enter the following code:
Private Sub BtnDel_Click(sender As Object, e As EventArgs) Handles BtnDel.Click
 Dim myitem
 myitem = InputBox(“Enter your item to delete”)
 MyCombo.Items.Remove("VB6")
End Sub
Running the program and clicking on the Delete Item Button will bring up an InputBox where the user can key in the item he or she wants to remove from the ComboBox, as shown in Figure 6.10.

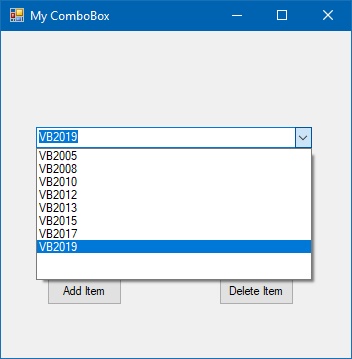
If the user key in VB6, the item will be deleted from the ComboBox, as shown in Figure 6.12.
To clear all the items at once, use the clear method, as illustrated in the following example. In this example, add a button and label it "Clear All Items" and name it as Btn_Clr. Enter the following Code:
Private Sub Btn_Clr_Click(sender As Object, e As EventArgs) Handles Button2.Click
 MyCombo.Items.Clear()
End Sub
Copyright©2008 Dr.Liew Voon Kiong. All rights reserved |Contact|Privacy Policy