In Visual Basic 2017, we need to create a connection to a database before we can access its data. Before we begin, let’s create a new database. Since we are using SQL Server 2016 as the database engine, we will use SQL Server Management Studio (SSMS) to create a database with the mdf extension. We shall name this database file as test.mdf. After creating the database, build a table called Contacts and create two fields and name them ContactName and State respectively. Enter a few data in the table and click Save All to save the data.
Now we are ready to connect to this new database.ADO.NET offers a number of connection objects such as OleDbConnection, SqlConnection and more. OleDbConnection is used to access OLEDB data such as Microsoft Access whilst SqlCOnnection is used to access data provided by Microsoft SQL Server. Since we will work with SQL database in our example, we will use the SqlConnection object.
To initialize the variable to a new SqlConnection object, we use the following syntax:
Private MyCn As New SqlConnectionHaving created the instance of the SqlConnecton object, the next step is to establish a connection to the data source using the SQL ConnectionString property. The syntax is:
MyCn.ConnectionString = “Data Source=Data Source=.\SQLEXPRESS; AttachDbFilename=C:Documents\vb2017\data\Test.mdf; ” & _
 “User Instance=True;Integrated Security=True; Connection Timeout=30;"
You need to change the reference to the SQL server as well as the path to database file Test.mdf in your local drive. After establishing the connection to the database, you can open the database using the following syntax:
MyCn.Open()
Establishing a connection to a database in Visual Basic 2017 using SqlConnection alone will not present anything tangible things to the user to manipulate the data until we add more relevant objects and write relevant codes to the project.
The next step is to create an instance of the SqlDataAdpater in our code so that we can populate the DataTable with data from the data source. Besides, you also need to create an instance of the DataTable. Other than that, you should also create an instance of the SqlCommandBuilder which is used to manipulate data such as updating and deleting data in the data table and send the changes back to the data source. The statements are:
Private MyDatAdp As New SqlDataAdapter
 Private MyCmdBld As New SqlCommandBuilder
 Private MyDataTbl As New DataTable
Besides that, we need to declare a variable to keep track of the user’s current row within the data table. The statement is
Private MyRowPosition As Integer = 0
Having created the above of objects, you need to include the following statements in the Sub Form_Load event to start filling the DataTable with data from the data source. The statements are as follows:
MyDatAdp = New SqlDataAdapter(“Select* from Contacts”, MyCn)
MyCmdBld = New SqlCommandBuilder(MyDatAdp)
 MyDatAdp.Fill(MyDataTbl)
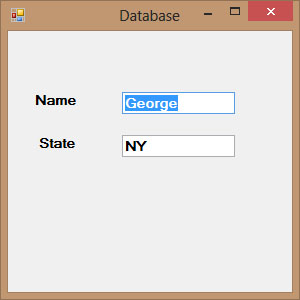
After filling up the DataTable, we need to write code to access the data. To access data in the DataTable means that we need to access the rows in the table. We can achieve this by using the DataRow object. For example, we can write the following to access the first row of the table and present the data via two text boxes with the name txtName and txtState respectively:
Dim MyDataRow As DataRow = MyDataTbl.Rows(0)
Dim strName As String
Dim strState As String
strName = MyDataRow(“ContactName”)
strState = MyDataRow(“State”)
txtName.Text = strName.ToString
txtState.Text = strState.ToStringMe.showRecords()
* The two fields being referenced here are ContactName and State. Note Index 0 means first row.
showRecords() is a sub procedure created to show data in the text boxes. The code is as follows:
Private Sub showRecords()
If MyDataTbl.Rows.Count = 0 Then
txtName.Text = “”
txtState.Text = “”
Exit Sub
End If
txtName.Text = MyDataTbl.Rows(MyRowPosition)(“ContactName”).ToString()
txtState.Text = MyDataTbl.Rows(MyRowPosition)(“State”).ToString()

End Sub
Public Class Form1
Private MyDatAdp As New SqlDataAdapter Private MyCmdBld As New SqlCommandBuilder Private MyDataTbl As New DataTable Private MyCn As New SqlConnection Private MyRowPosition As Integer = 0
Private Sub Form1_Load(sender As Object, e As EventArgs) Handles MyBase.Load
 MyCn.ConnectionString = "Data Source=TOSHIBA-PC\SQL2012; AttachDbFilename=C:\Program Files\Microsoft SQL
 Server\MSSQL11.SQL2012\MSSQL\DATA\Test.mdf; "&_ “User Instance=True;Integrated Security=SSPI”
 MyCn.Open()
 MyDatAdp = New SqlDataAdapter("Select* from Contacts", MyCn)
 MyCmdBld = New SqlCommandBuilder(MyDatAdp)
 MyDatAdp.Fill(MyDataTbl)

 Dim MyDataRow As DataRow = MyDataTbl.Rows(0)
 Dim strName As String
 Dim strState As String
 strName = MyDataRow("ContactName")
 strState = MyDataRow("State")
 TxtName.Text = strName.ToString
 TxtState.Text = strState.ToString()
 Me.showRecords()
End Sub

Private Sub showRecords()
If MyDataTbl.Rows.Count = 0 Then
txtName.Text = ""
txtState.Text = ""
 Exit Sub
 End If
 txtName.Text = MyDataTbl.Rows(MyRowPosition)("ContactName").ToString()
 TxtState.Text = MyDataTbl.Rows(MyRowPosition)("State").ToString()
 End Sub
 End Class

We shall discuss how to navigate the database and manipulate data in next lesson.
Copyright©2008 Dr.Liew Voon Kiong. All rights reserved |Contact|Privacy Policy