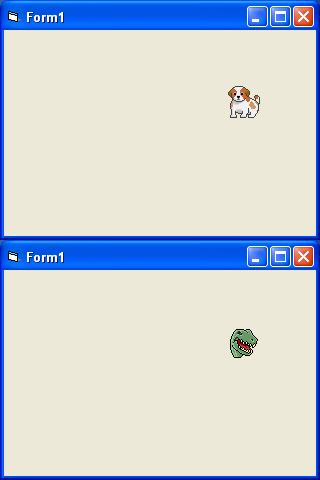
在第29課及第30課裡,你學習的只是手工動畫。這意味著你需要連續單擊某個命令按鈕或按下一個鍵來使對象移動。為了使對象能自動移動,你需要使用一個定時器(Timer)。創建自動動畫的第一步是將定時器從工具箱拖放到窗體並設置其時間間隔一定的值。 1的值是1毫秒,這意味著值1000表示1秒。定時器的時間間隔的值,將決定動畫的速度。
在下面的范例中,我門使用了一個非常簡單的技術,就是設定可見屬性= False和可見屬性= true來交替顯示和隱藏圖像以顯示動畫。當你點擊該程序,你應該看到下面的動畫。

Private Sub Timer1_Timer()
If Image1.Visible = True Then
Image1.Visible = False
Image2.Visible = True
ElseIf Image2.Visible = True Then
Image2.Visible = False
Image1.Visible = True
End If
End Sub
下面的例子顯示自動動畫,如蝴蝶扇動翅膀。。在這個范例裡,你需要插入一組八張蝴蝶扇動翅膀的圖像。接下來,把定時器插入表單裡並設定時間間隔為10或任何你喜歡的值,把Timer1.Enabled 設定為True。請記住把image1圖象可見屬性設為True 而把其他圖像的可見屬性設為False。最后需要在timer1_timer子程序下輸入制造動畫會效果的程式碼。當我們啟動這個應用程式時,計時器將以間隔10毫秒的時間開始運作,你將看到下面的動畫:

程式碼
Private Sub Form_Load()
Image1.Visible = True
x = 0
End Sub
Private Sub Timer1_Timer()
If Image1.Visible = True Then
Image1.Visible = False
Image2.Visible = True
ElseIf Image2.Visible = True Then
Image2.Visible = False
Image3.Visible = True
ElseIf Image3.Visible = True Then
Image3.Visible = False
Image4.Visible = True
ElseIf Image4.Visible = True Then
Image4.Visible = False
Image5.Visible = True
ElseIf Image5.Visible = True Then
Image5.Visible = False
Image6.Visible = True
ElseIf Image6.Visible = True Then
Image6.Visible = False
Image7.Visible = True
ElseIf Image7.Visible = True Then
Image7.Visible = False
Image8.Visible = True
ElseIf Image8.Visible = True Then
Image8.Visible = False
Image1.Visible = True
End If
End Sub