[Lesson 4]<<[Contents]>>[Lesson 6]
5.1 TextBox
In this lesson, we shall learn how to work with some common controls in Visual Basic 2015. Among the commonly used controls are the label, text box, button, list box, combo box, picture box, timer and more. However, in this lesson, we shall only deal with the text box and the label. The text box is for accepting input from the user as well as to display the output. It can only handle string (text) and numeric data . String in a text box can be converted to a numeric data by using the function Val(text).
Example 5.1
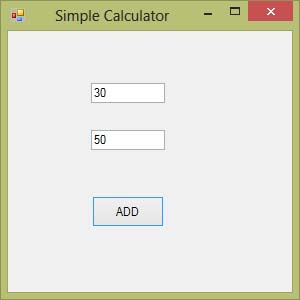
The following program will add the value in text box 1 and the value in text box 2 and output the sum in a message box.
Private Sub Button1_Click(sender As Object, e As EventArgs) Handles Button1.Click
MsgBox("The sum is "&Val(TextBox1.Text) + Val(TextBox2.Text))
End Sub
The output window:
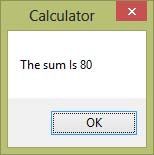
After clicking Add button, you can get the answer in a message box, as shown in Figure 5.2:
Figure 5.2
5.2 The Label
The label in Visual Basic 2015 can be used to provide instructions to the user as well as to display the outputs. It is different from text box because it can only display static text, which means the user cannot change the text. By using the syntax Label.Text, it can display text and numeric data. On the other hand, you can also change its text in the properties window and also at runtime.
Example 5.2
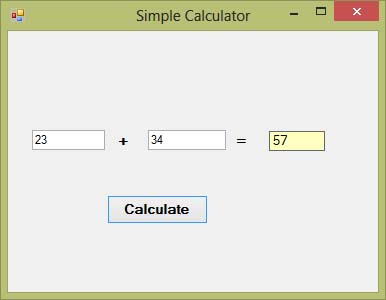
In this visual basic 2015 program, instead of showing the sum in a message box, we wish to display the sum on a label. This a simple calculator program that can calculate the sum of two numbers entered by the user. To design the interface, you add two text boxes, three labels and a button on the form. Under the respective properties windows, change the name of the first text box to txtNum1 and the name of the second textbox to txtNum2.
Next, change the text of the first label to +, the text of the second label to =. For the third label, change the autosize property to false and the name to LblAns. Drag the third label to appropriate size and set its background to yellow color. For the button, change its name to BtnCal and its text to Calculate. Lastly, change the text of the form to Simple Calculator. The two text boxes are used to accept inputs from the user. We programmed the button to calculate the sum of the two numbers using the plus operator.
The Code
Public Class Form1
Private Sub BtnCal_Click(sender As Object, e As EventArgs) Handles BtnCal.Click
Dim num1 As Single = Val(TxtNum1.Text)
Dim num2 As Single = Val(TxtNum2.Text)
Dim Sum As Single = num1 + num2
LblAns.Text = Sum.ToString

End Sub
End Class
The Dim keyword is to declare a number as a single precision number and the function Val is to convert a string to a number. In addition, the method ToString is to display an output as a string. We shall learn more about Dim in a later lesson.
The output window:


